Installation
Eventmie Pro can be installed via composer. Bruhhh... 💪
{info.fa-youtube} A complete video tutorial guide for getting started quickly is Coming Soon
- Prerequisites
- Server Requirements
- Installation Errors
- Install
- Web Installer
- Purchased From Codecanyon
- Configurations
Prerequisites
- Laravel version 5.5 / 5.6 / 5.7 / 5.8 / 6.x and above
- Make sure to install the Eventmie Pro package on a Fresh or Existing Laravel application.
- We also assume that you've set up the database.
- If you're running MySql version older than < 5.7 then disable strict mode in Laravel
config/database.php'strict' => false
Server Requirements
Before you start. Make sure your server meets atleast the below requirements. (necessarily required!!!)
- PHP >= 7.1.3
- MySql >= 5.7.7
- MariaDB >= 10.2.2 (if you're using MariaDB)
- BCMath PHP Extension
- Ctype PHP Extension
- JSON PHP Extension
- fileinfo PHP Extension
- Mbstring PHP Extension
- OpenSSL PHP Extension
- PDO PHP Extension
- Tokenizer PHP Extension
- XML PHP Extension
- iconv PHP Extension
{success} Before buying a hosting, simply confirm these requirements with their support team.
Installation Errors
If you're getting error - 1071 Specified key was too long; while installation, it's due to older Mysql version. To resolve these, follow the below simple step and then try installing again.
-
Go to file
config/database.phpand change these values inmysqlsection. . . 'charset' => 'utf8', 'collation' => 'utf8_unicode_ci', 'strict' => false, 'engine' => 'InnoDB ROW_FORMAT=DYNAMIC', . . .
Install
-
If installing Eventmie Pro on an existing Laravel application and you already have Auth system then skip this step
if installing Eventmie Pro on Fresh Laravel application then run
For Laravel 5.5 to 5.8
php artisan make:auth

php artisan migrate
For Laravel 6.x
composer require laravel/ui --dev php artisan ui vue --auth npm install && npm run dev php artisan migrate -
Unzip the
eventmie-pro.zipfile, copy theeventmie-profolder and place it in your Laravel application root directory.{warning} The folder name must be
eventmie-proin your Laravel website directory. -
Open your Laravel application
composer.jsonfile and paste the below code in the end (right before last curly}bracket)"repositories": [{ "type": "path", "url": "eventmie-pro/" }](once you complete, the
composer.jsonfile will look something like this){ . . . . . "minimum-stability": "dev", "prefer-stable": true, "scripts": { "post-autoload-dump": [ "Illuminate\Foundation\ComposerScripts::postAutoloadDump", "@php artisan package:discover --ansi" ], "post-root-package-install": [ "@php -r \"file_exists('.env') || copy('.env.example', '.env');\"" ], "post-create-project-cmd": [ "@php artisan key:generate --ansi" ] }, "repositories": [{ "type": "path", "url": "eventmie-pro/" }] } -
Install Eventmie Pro via Composer
composer require classiebit/eventmie-pro -
Run Eventmie Pro install command
php artisan eventmie:install -
While installation, it will ask you for the license code. Enter the license code to complete the installation process.
{info} Remember, one license code is valid for one domain only. Contact support for more details.
Web Installer

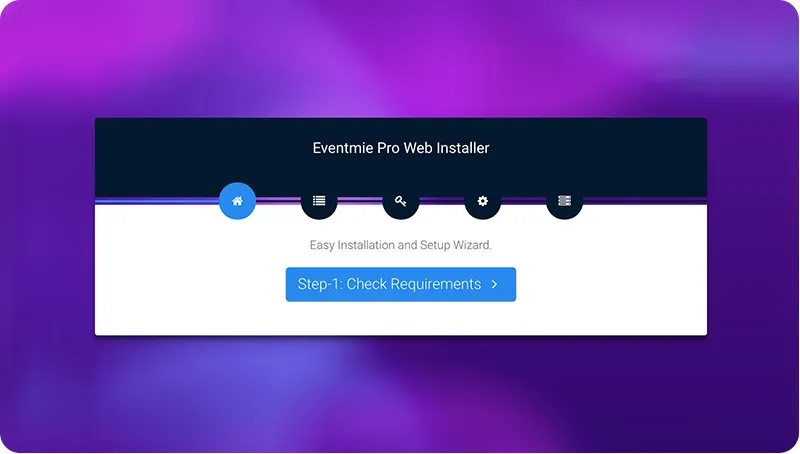
Eventmie Pro v1.1.1 introduced a new web-installer, which installs Eventmie Pro directly on the web-server in few clicks.
{warning} Recommended way to install Eventmie Pro is from the above manual method. Developers must go with the manual method. First, install it locally then deploy it to a live server. Web Installer method is only for non-developers who want to install Eventmie Pro directly on web-server/hosting/CPANEL.
To start with Eventmie Pro web-installer. After purchase & downloading Eventmie Pro, on extracting eventmie-pro.zip, you'll get two folders-
eventmie-pro- This is eventmie-pro PACKAGE for installation via the above manual method (command line)eventmie-pro-web installer- This is eventmie-pro WEB-INSTALLER, to install Eventmie-pro via the web interface.
{info} Web-installer installs everything including - Laravel Framework + Eventmie Pro package + Database + all other composer dependencies. So if you're not a developer, you can use web-installer to install Eventmie Pro easily in few clicks.
Follow these simple steps for getting started with web-installer.
-
Copy all the folders & files from
eventmie-pro-web installerand paste them inside the website directory. e.gpublic_html -
Open the
.envfile atpublic_html/.envand enter the database credentials. It's important to enter database credentials manually before proceeding to web-installer.. . . DB_DATABASE=<database-name> DB_USERNAME=<database-user-username> DB_PASSWORD=<database-user-password> . . . -
Then visit the website URL, and it'll first ask for License code. Enter it and click Proceed.
-
After successful license verification, it'll redirect to the Eventmie Pro web-installer steps form.
-
In the steps form, everything is self-explanatory.
-
Step-1: Check server requirements. It'll auto check the webserver requirements, and will point out if some PHP extension is missing. If in case some extensions missing, you simply contact your web server/hosting provider, and they'll install those missing extensions, after that, return to the installer and try again.
-
Step-2: Check Folder Permissions. If you see some red cross. Change two folder permissions
storage&bootstrap. (you'll see more info about this on the installer page.) -
Step-3: Enter Website Name, URL & Database Credentials.
-
-
Final step: Click install.
Purchased From Codecanyon
If you've purchased Eventmie Pro from Codecanyon codecanyon.net then follow these simple steps-
- Enter
Purchase-codeas a License key in the Eventmie Pro installer. - Visit classiebit.com, signup as new user and go to Downloads
- Click on
Purchased from Codecanyon? - In the popup, enter the Purchase-code and submit. You'll see the product on the download list.
- At last, add the authorized domain. And you're good to go. 👍
Configurations
After installation, you'll see the Eventmie config config/eventmie file. You can make the following changes-
-
Route config - whether to run Eventmie as a base site e.g
example.comor on a specific URL e.gexample.com/myevents'route' => [ 'prefix' => null, // for front-end 'admin_prefix' => 'admin', // for admin panel ], -
RTL Languages - Eventmie detects RTL language from this list and changes site direction accordingly. You can add any other RTL language to the list.
'rtl_langs'        => [
    'ar', // arabic
    'fa', // persian
    'he', // hebrew
    'ms', // malay
    'ur', // urdu
    'ml' // malayalam
],