{success} This Feature only available in Eventmie Pro FullyLoaded
Bitpay Crypto Payment Gateway
Crypto Currency Payment gateway to accept all available Cryptocurrencies in the world using BitPay. You can also pay using BitPay wallet.
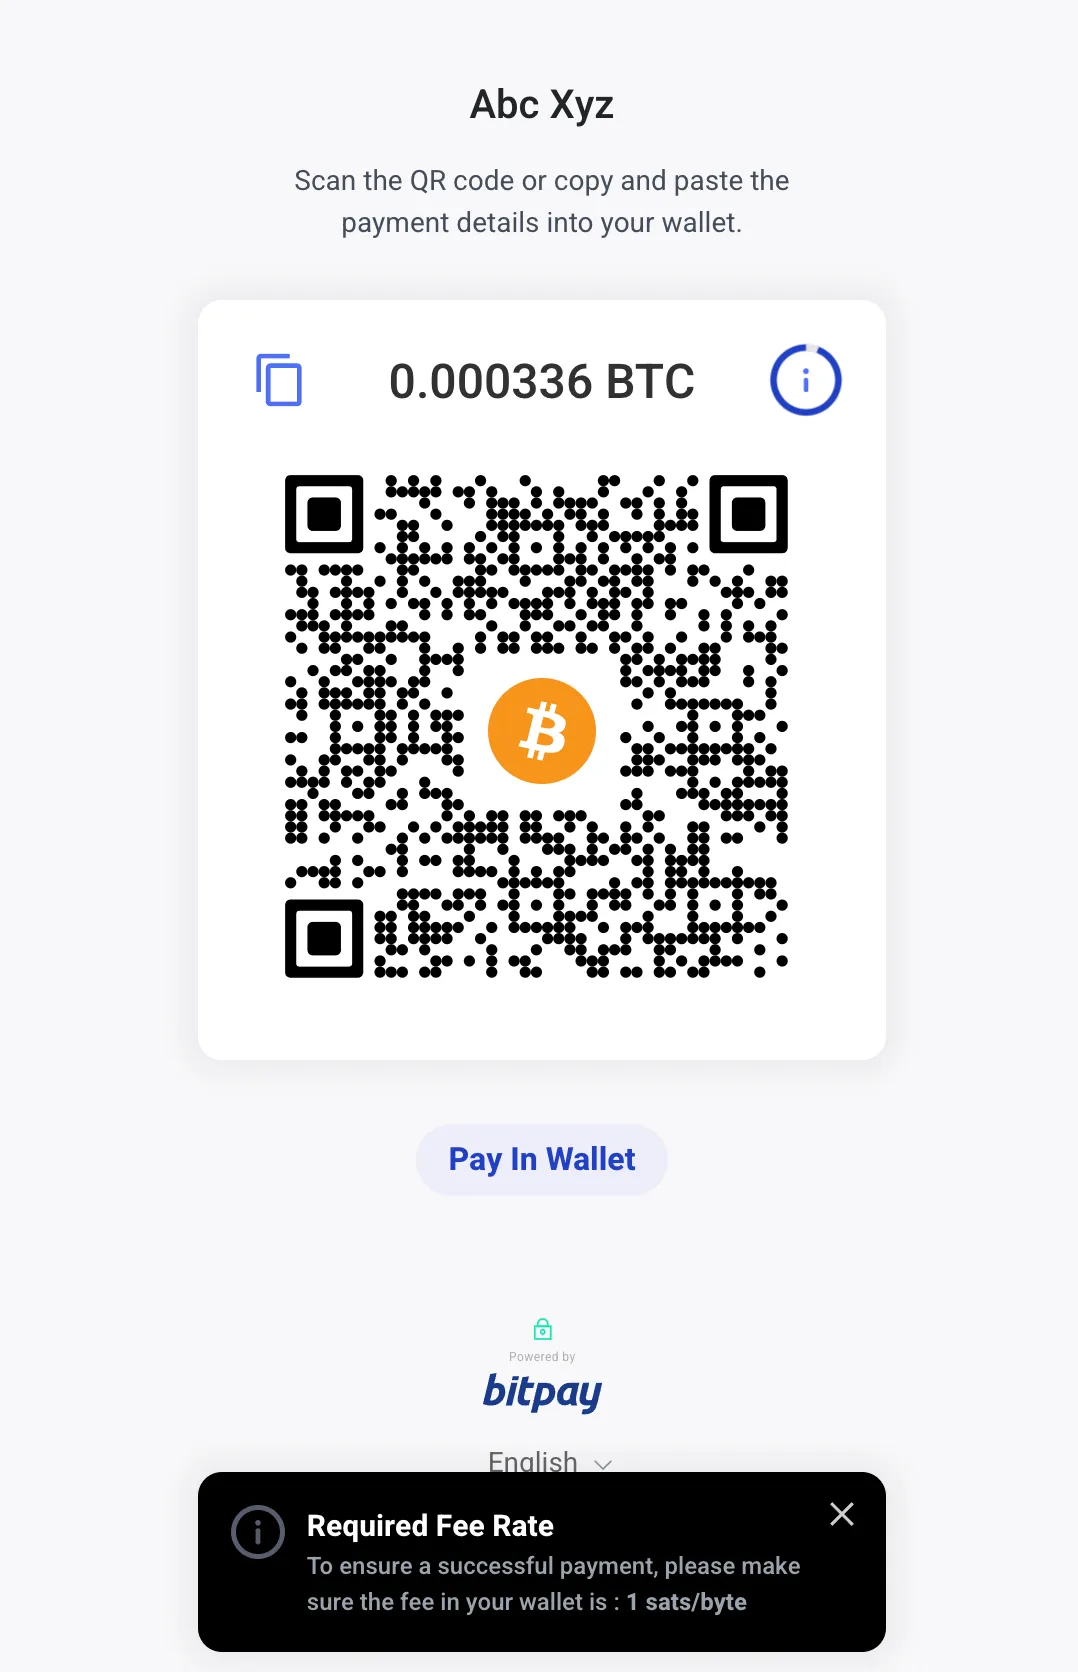
To activate it you need to follow through the below setup process. After that, attendees can pay from various Cryptocurrencies that are available in Bitpay, such as,
Requirements
- Setup a Test BitPay Merchant account at test.bitpay.com
- Setup a Production BitPay Merchant account at bitpay.com
Setup Test BitPay
You can only setup BitPay online and not on localhost. Hence, please follow the below steps after uploading your website on your live domain.
Now, let's setup Test BitPay for test payment. The production BitPay setup is same as test. Hence, make sure you create a BitPay merchant account at both-
-
Login into your website as Admin and visit Admin Panel -> Settings -> Apps tab.
-
Enter
- BitPay Key Name: Enter a new random value e.g AbcXyzzMedia
- BitPay Encrypt Code: Enter a new random secret code e.g KJHakj879&*kjkjh
- Keep BitPay Production Off
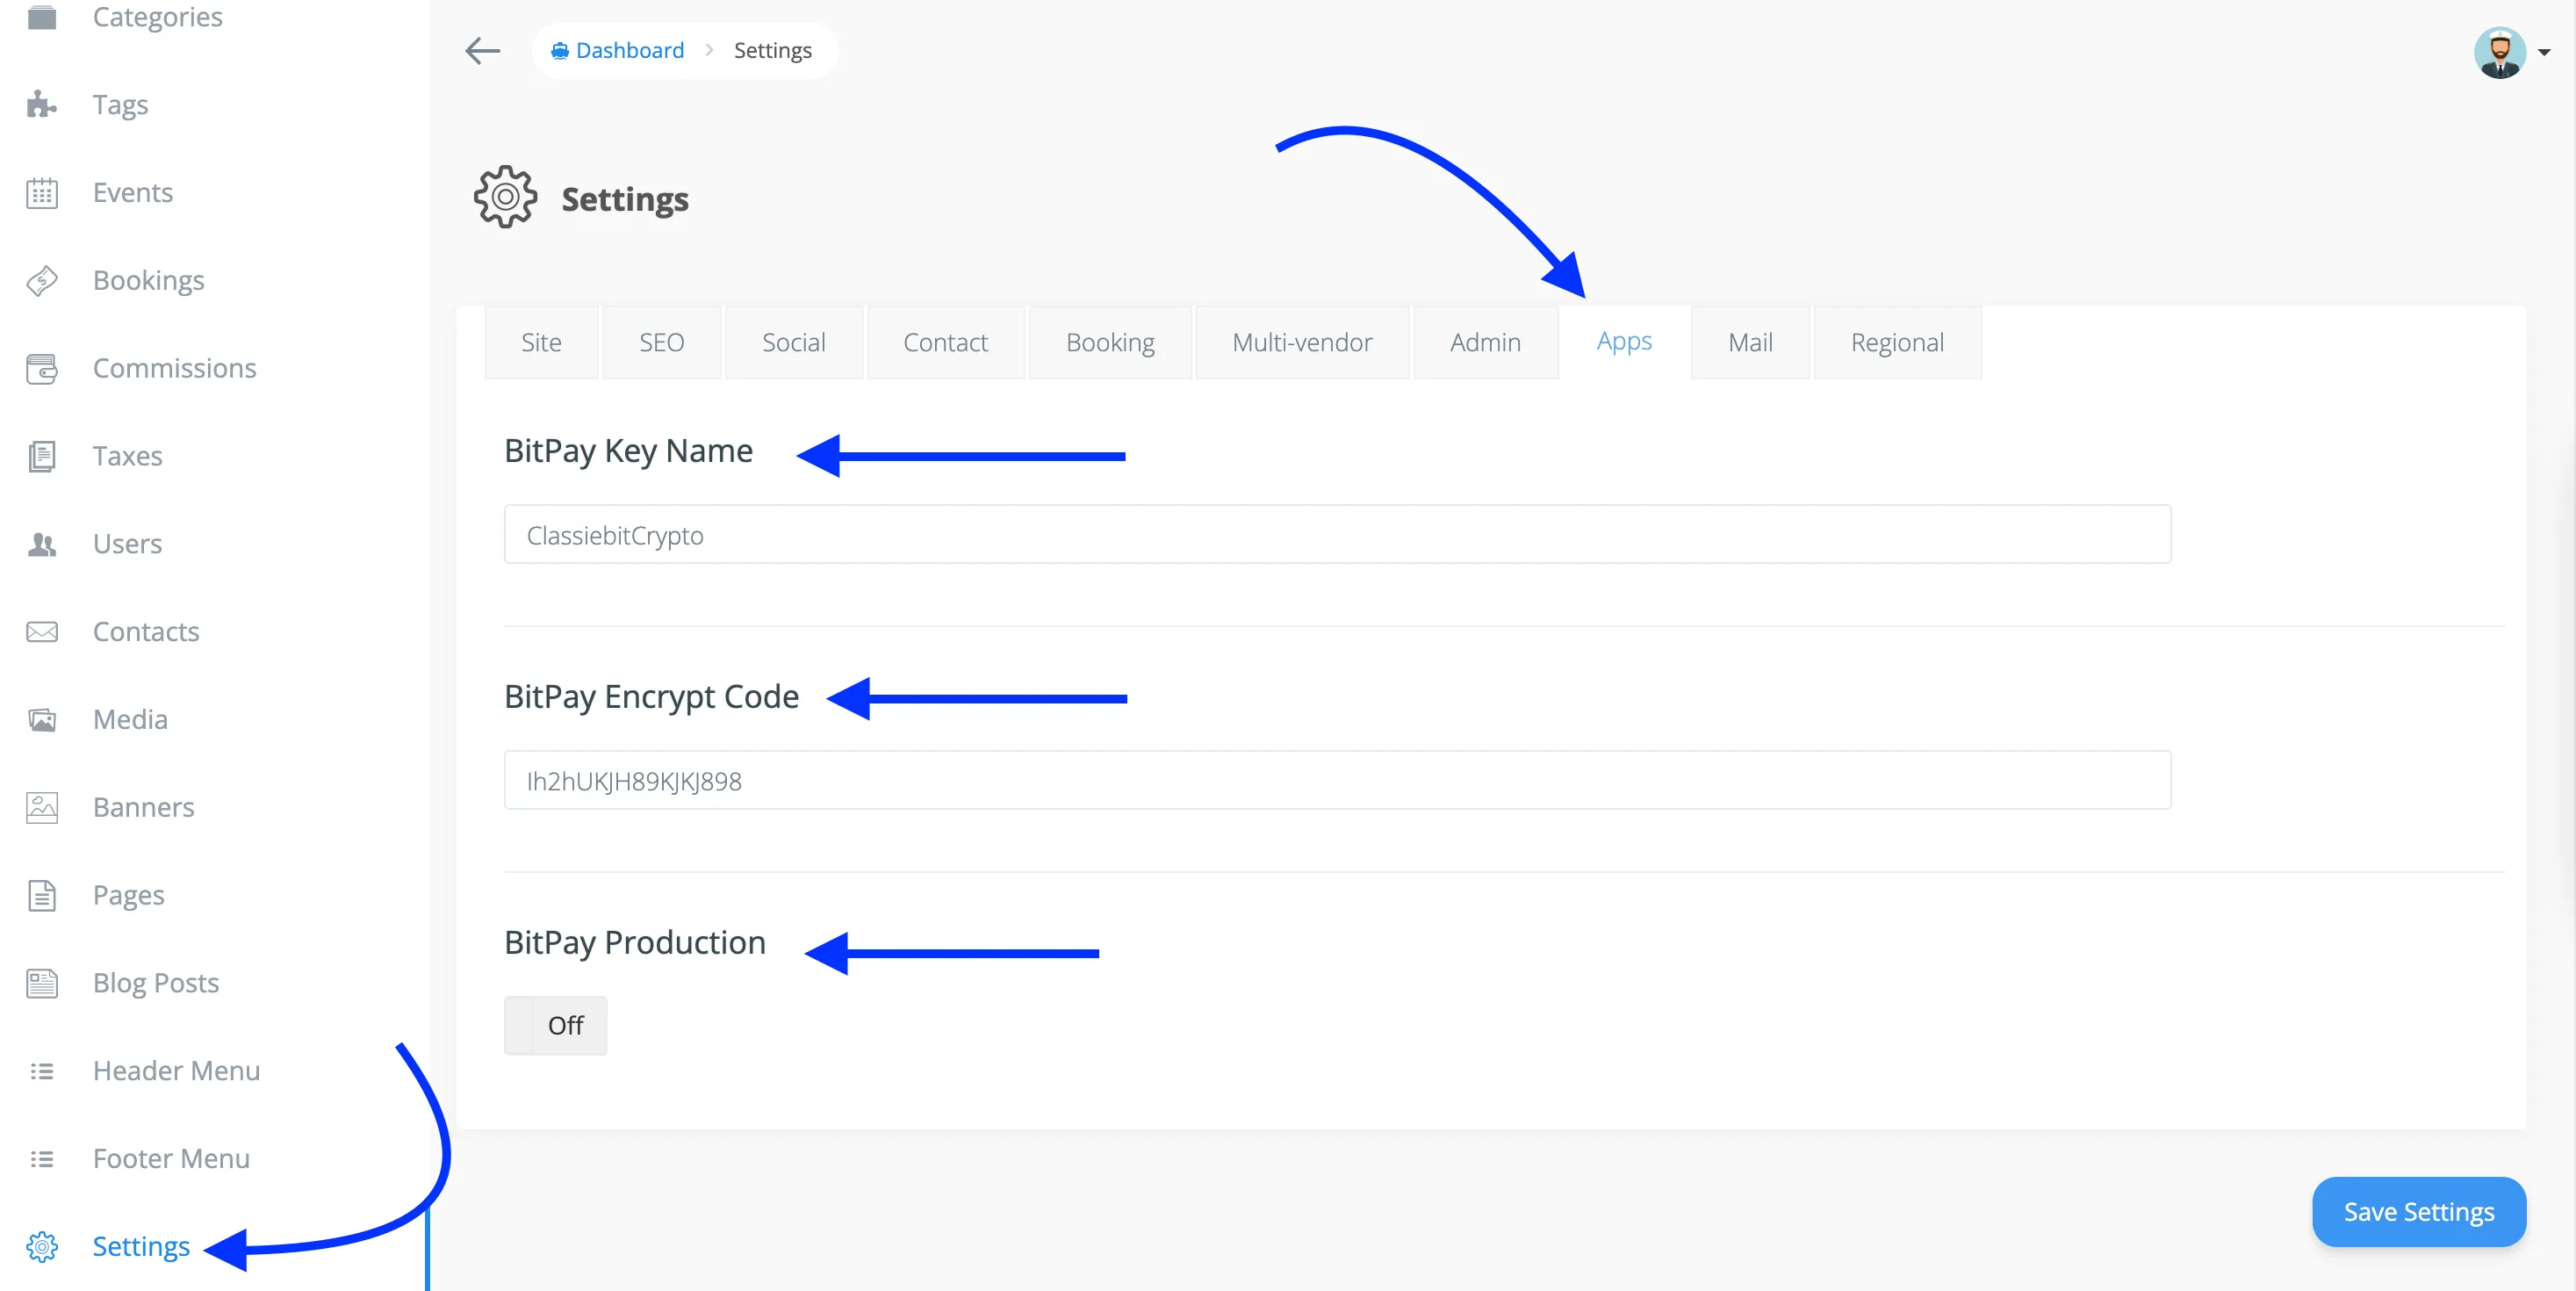
{primary} The BitPay Key Name and Encrypt code are not obtained by BitPay, you can enter any random secret code. And don't change them once you entered.
-
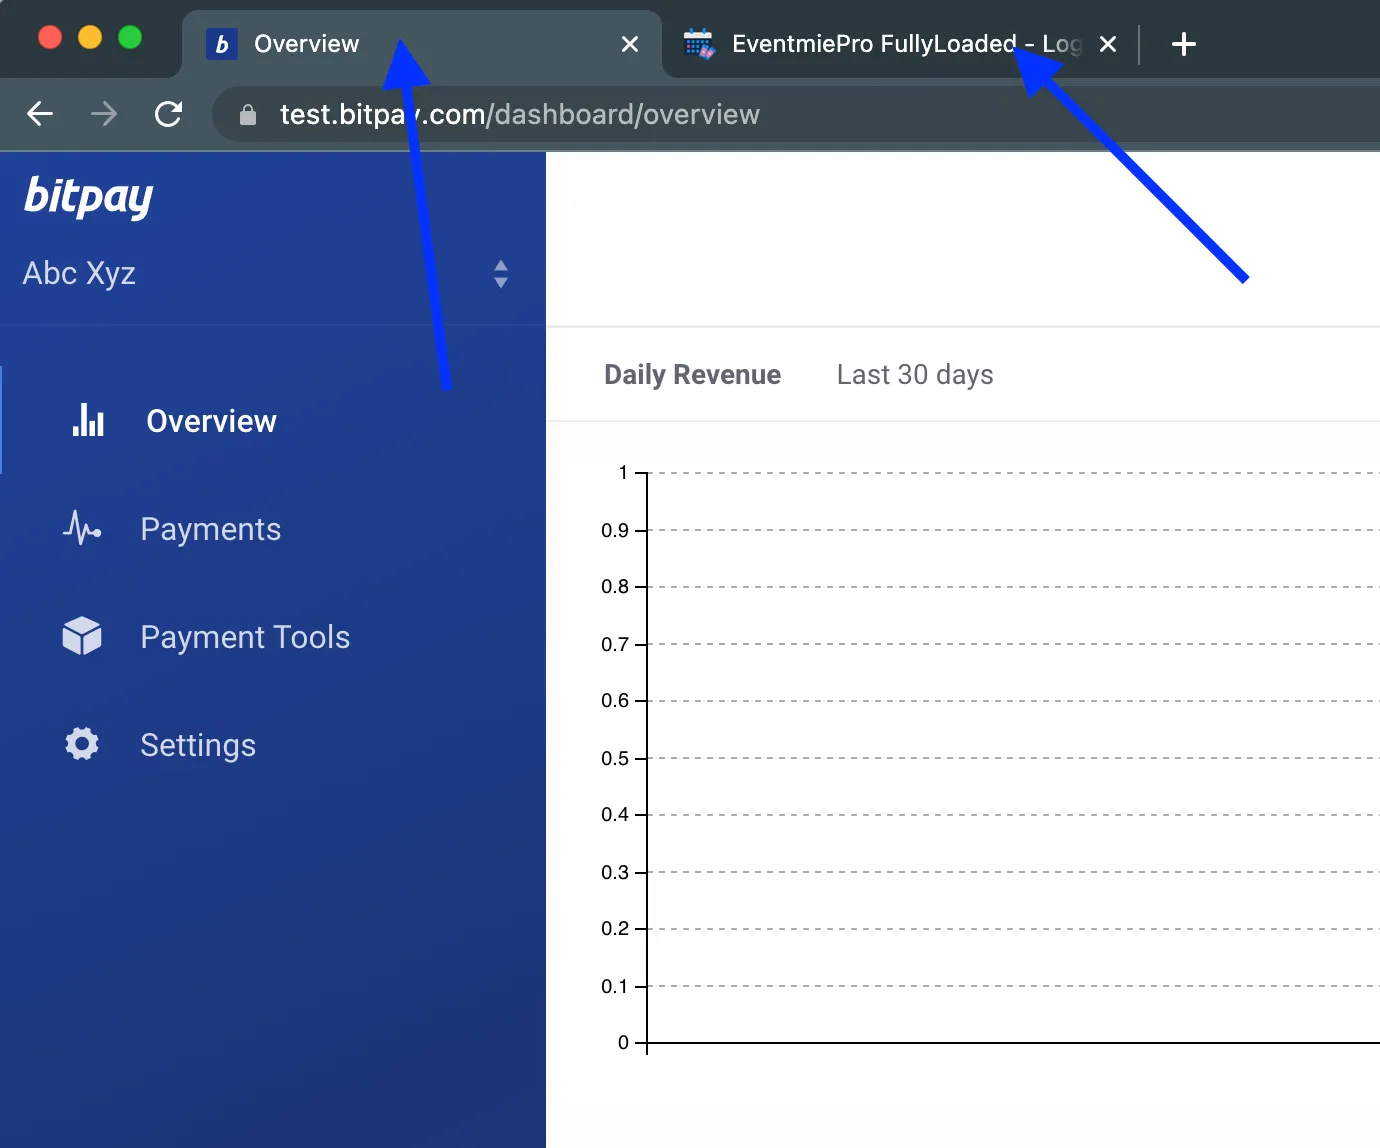
Now, logout as Admin and Login with a Customer account into your website and keep the tab opened.
-
Then open a new tab and visit test.bitpay.com.
-
Login into your Test BitPay Merchant account.
-
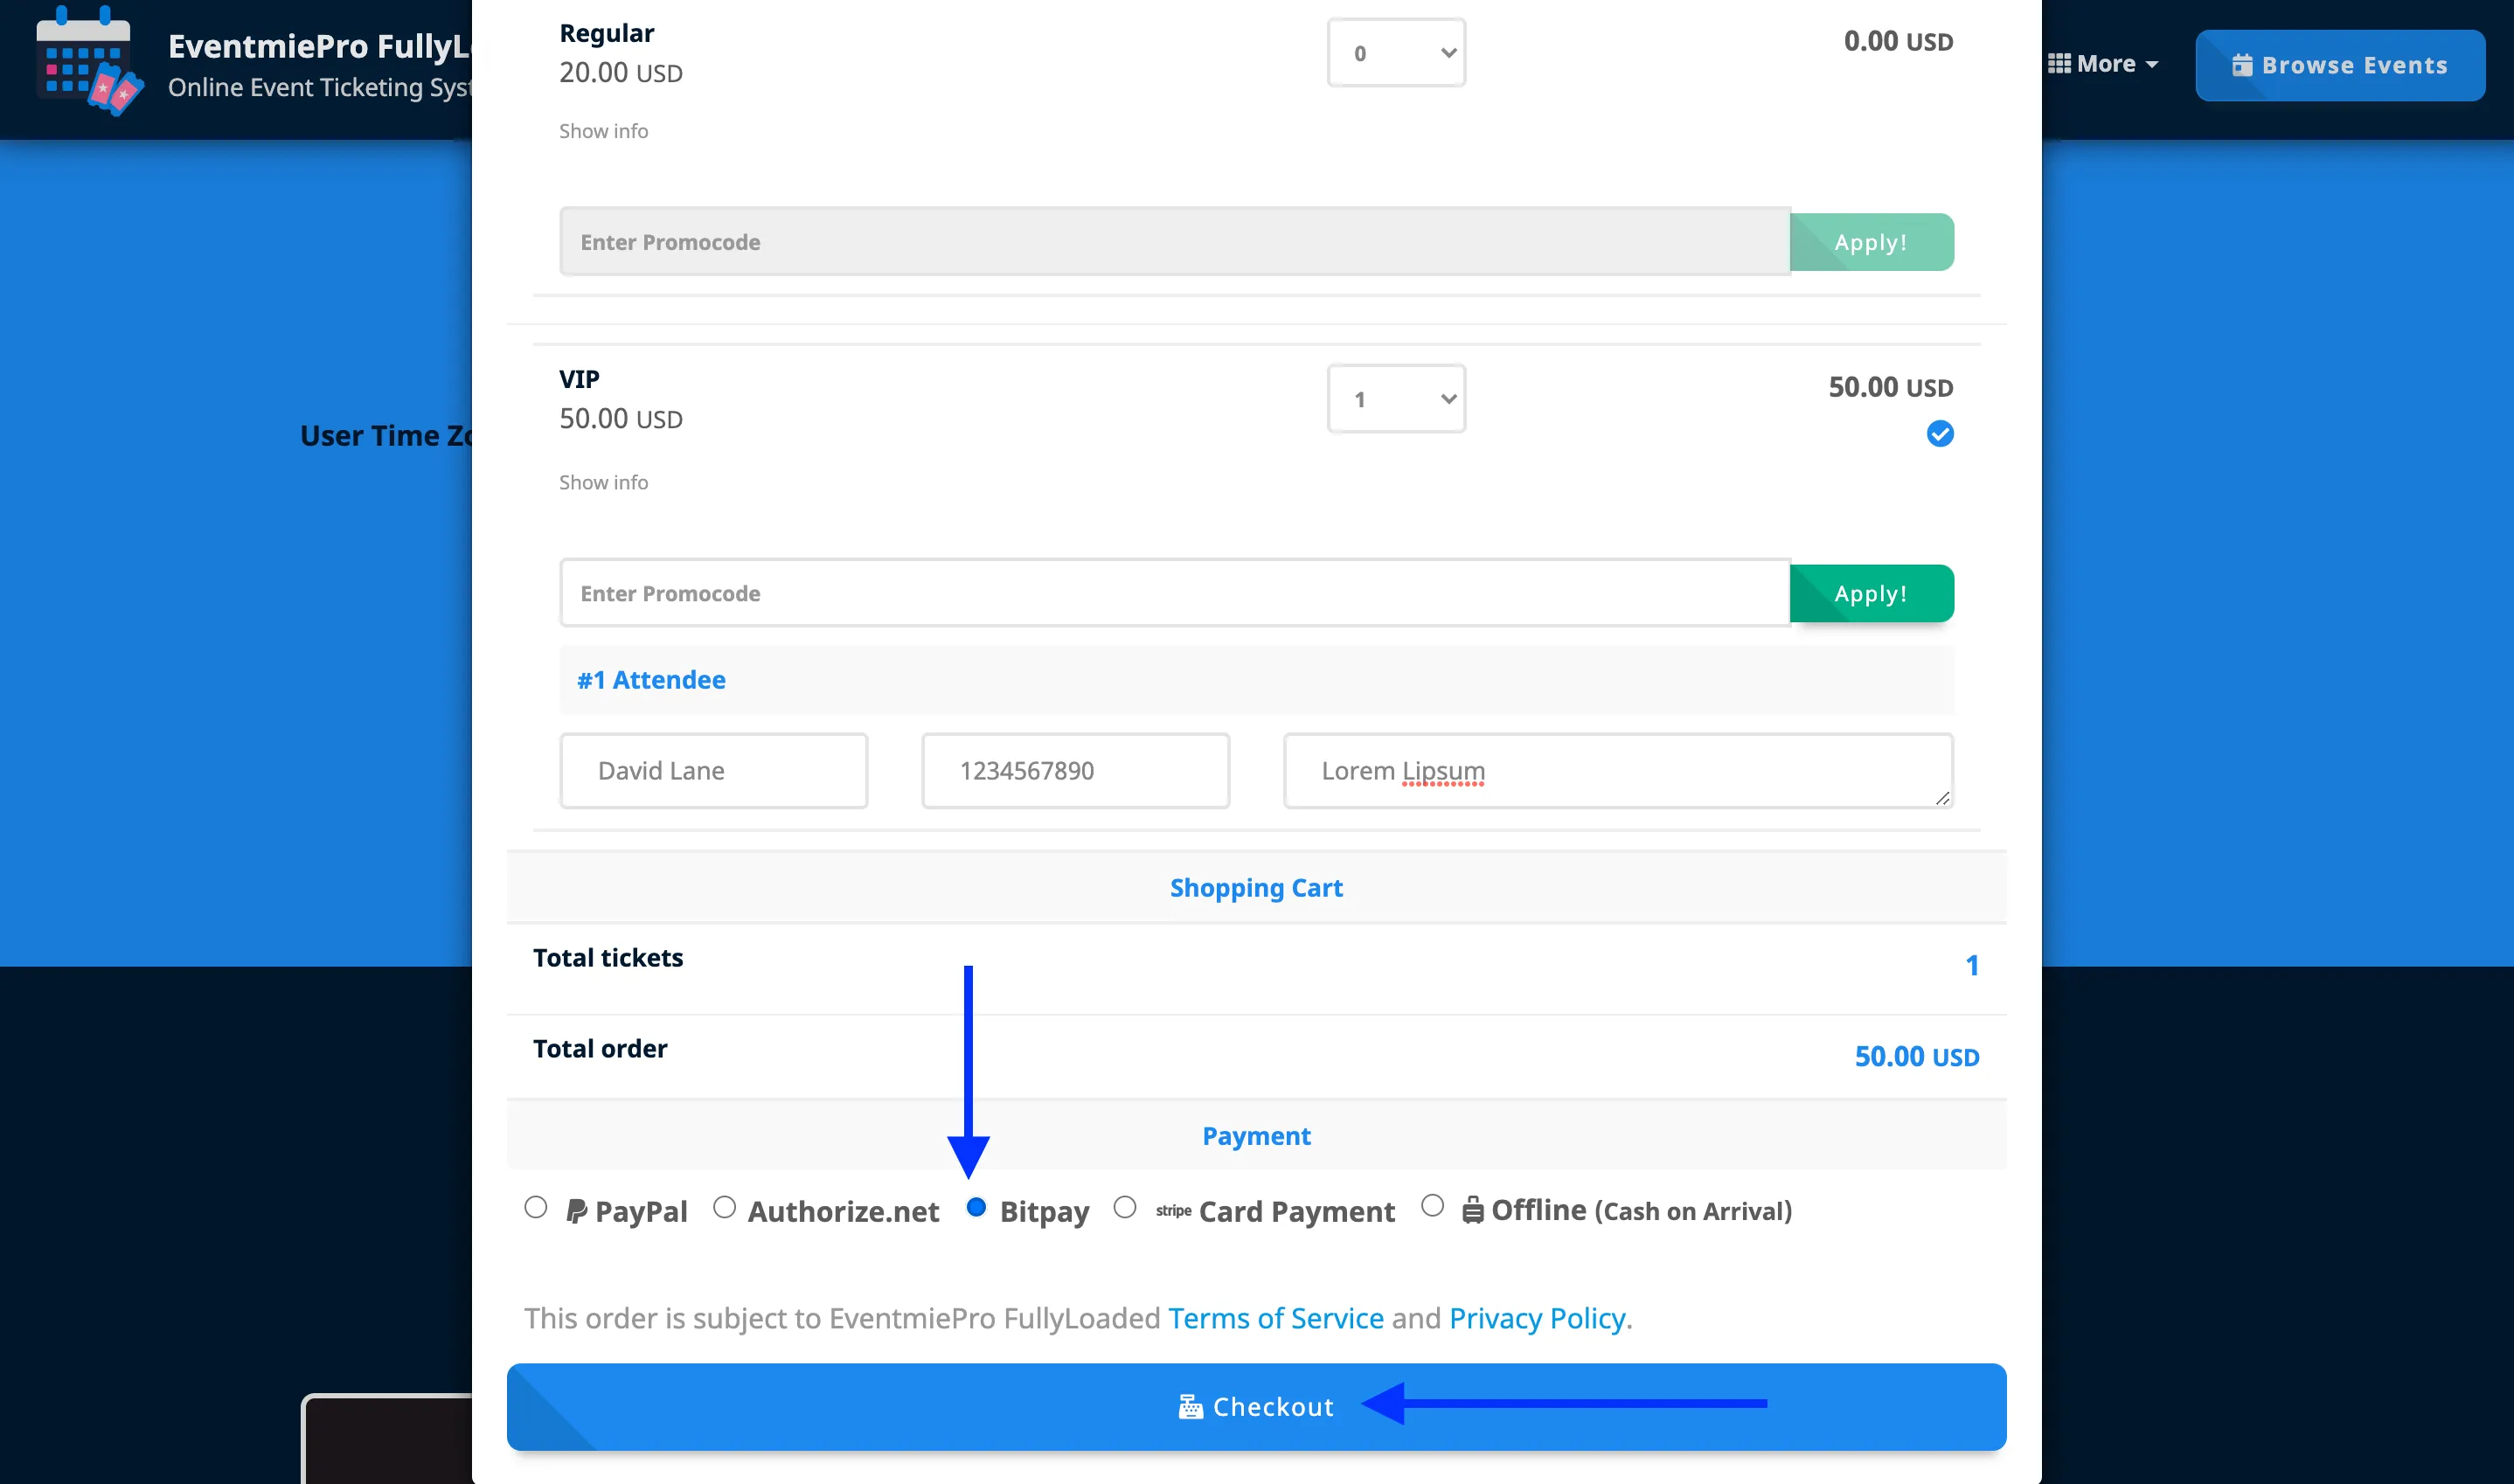
Switch to your website tab and go to an Event Page and Checkout with BitPay.
-
This checkout is just to create a BitPay Test credentials file on your server, and that file will create a connection between your website and your BitPay Merchant account.
-
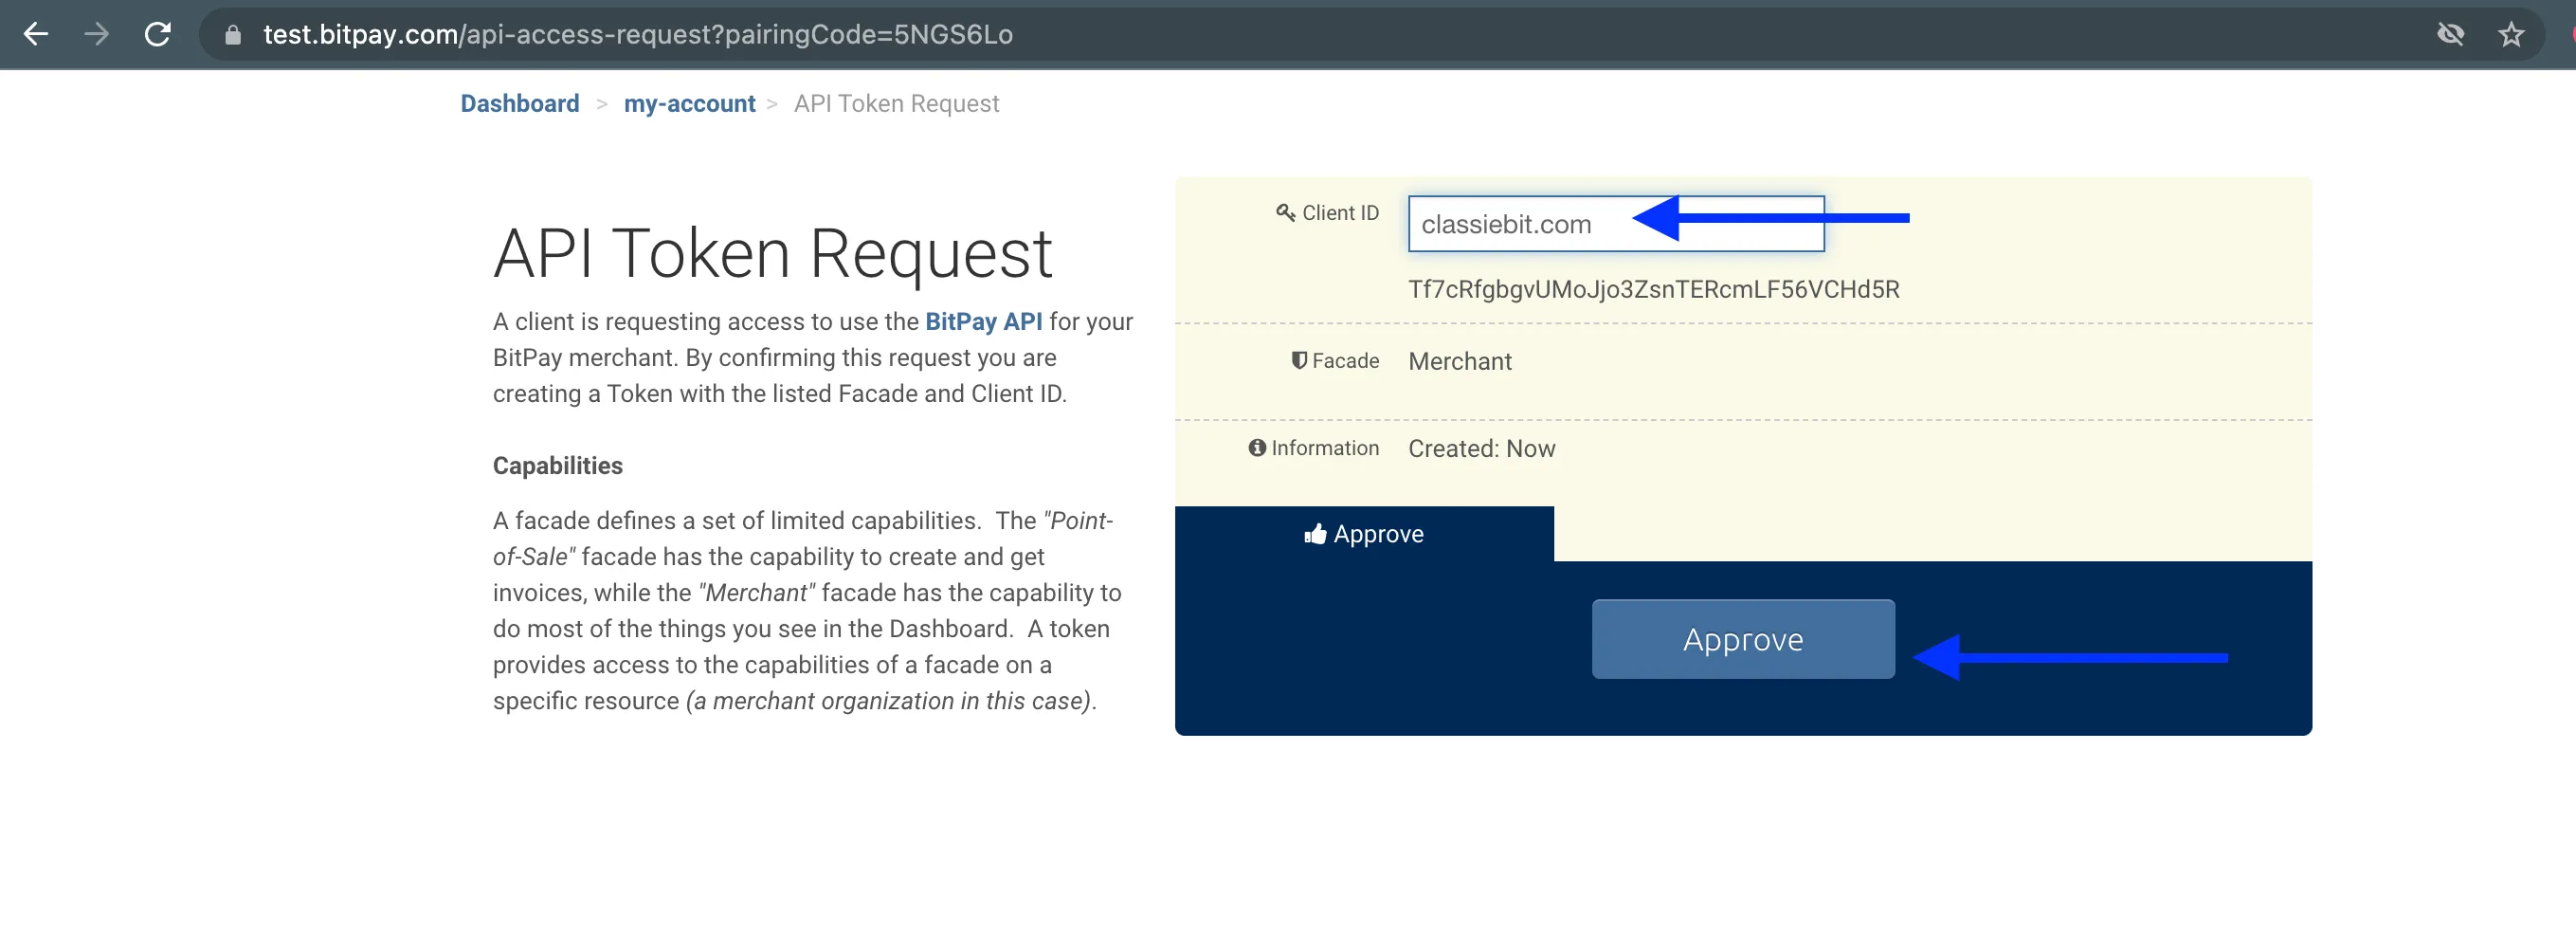
Enter your website/brand name in Client ID and click Approve.
-
Close the Bitpay tab that you're in and setup complete.
Setup Production BitPay
Setup Production BitPay to accept real Cryptocurrencies into your BitPay account.
- Login into your website as Admin and visit Admin Panel -> Settings -> Apps tab.
- Turn BitPay Production On
- Now, logout as Admin and Login with a Customer account into your website and keep the tab opened.
- Then open a new tab and visit bitpay.com.
- Login into your Production BitPay Merchant account.
- Switch to your website tab and go to an Event Page and Checkout with BitPay.
- This checkout is just to create a BitPay Production credentials file on your server, and that file will create a connection between your website and your BitPay Merchant account.
- Enter your website/brand name in Client ID and click Approve.
- Close the Bitpay tab that you're in and setup complete.
Pay with Cryptocurrencies
Once the above setup is done, the attendees can pay with Cryptocurrency-
-
Go to Checkout popup and selct BitPay payment option.
-
On the next page, login into customer Bitpay account and proceed.
-
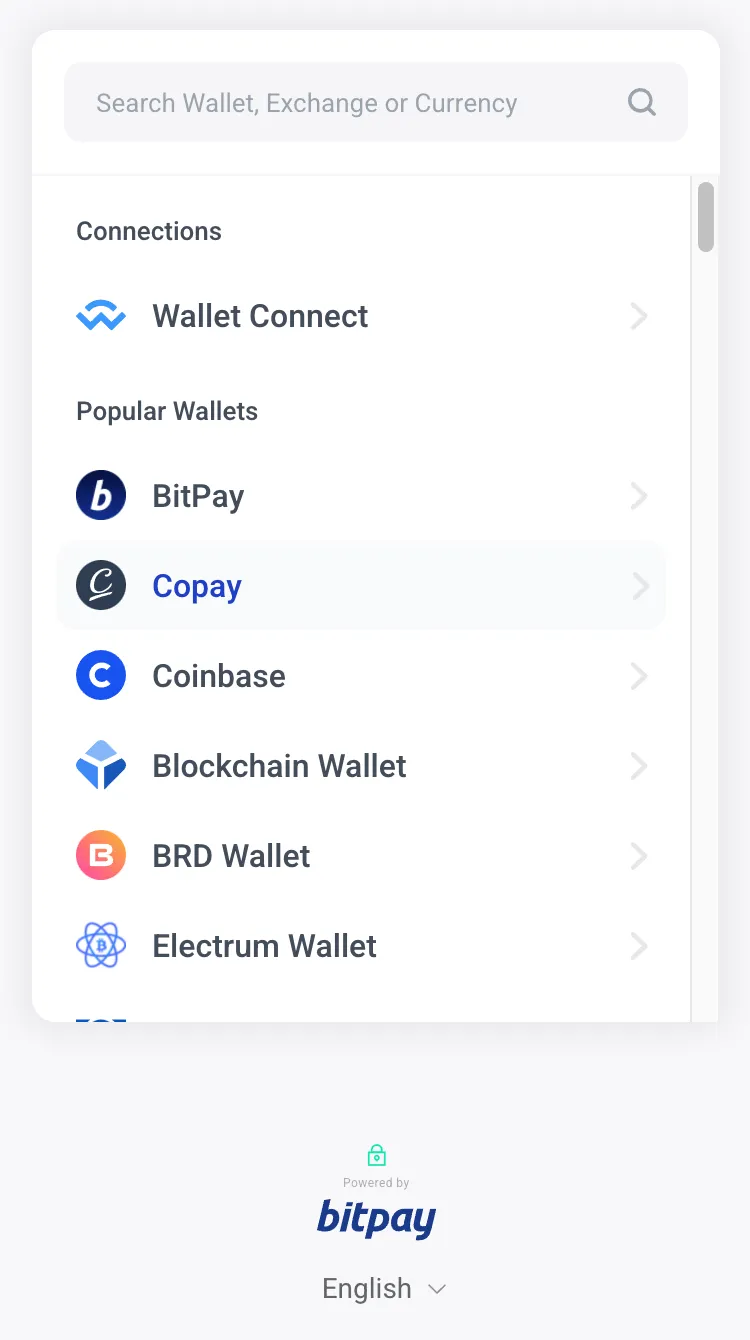
Select a Cryptocurrency to pay with.
-
And finally, you'll see a QrCode at which, you can send Cryptocurrency.

-
And after successful payment, you'll be redirected to webstie with successful booking.